Student life can get messy fast.
You have classes, assignments, exams, part-time work, club activities, personal plans, and small tasks that are easy to forget. A normal calendar app can help you remember when something happens, but it does not always help you think through your day.
That is why many students still like using planners.
A planner gives you space to write, organize, reflect, and adjust your schedule in a more flexible way. And when you use an iPad planner, you can combine the structure of a digital calendar with the freedom of handwriting.
In this article, we will look at how students can use an iPad planner to organize classes, assignments, and study time more clearly.
Why students need more than a calendar app
Calendar apps are great for fixed events.
They work well for things like:
- Class schedules
- Exam dates
- Club meetings
- Part-time work shifts
- Appointments
But student planning is not only about fixed events.
You also need to manage flexible tasks, such as reading chapters, preparing presentations, reviewing notes, writing essays, and studying for exams.
These tasks do not always fit neatly into a calendar. They often need to be broken down, moved around, or rewritten depending on your energy and workload.
That is where a planner becomes useful.
A planner helps you see not only when something happens, but also what you need to do around it.
The problem with paper planners
Paper planners are simple and comfortable to use. Many students like them because they are easy to open, quick to write in, and not full of notifications.
But paper planners also have limits.
If your class schedule changes, you may need to rewrite it.
If you make a mistake, the page can become messy.
If you forget your planner at home, you cannot check it later.
If you want to move tasks around, it can become annoying.
For students who already use an iPad for studying, note-taking, or reading PDFs, a digital planner can be a more flexible option.
You still get the feeling of writing by hand, but with the advantages of a digital tool.
Why an iPad planner works well for students
An iPad planner is useful because it sits between a paper planner and a calendar app.
You can write with Apple Pencil, just like you would in a notebook. But you can also use digital features that make planning easier.
For example, you can:
- Write assignments by hand
- Move between daily, weekly, and monthly pages
- Keep your planner with your study materials
- Use stickers or highlights to mark important dates
- Combine fixed events with flexible handwritten notes
This makes it easier to manage both your schedule and your actual study work.
1. Add your class schedule first
The first step is to add your class schedule.
Classes are the foundation of a student planner because they usually decide how the rest of your week looks.
Once your class schedule is visible, you can plan around it more realistically.
For example, you may notice that Monday is already full, so it is not a good day to plan a long study session. Or you may see that Wednesday afternoon is open, which makes it a good time to work on assignments.
When your classes are already on the planner page, you do not have to keep switching between your calendar and your notes.
2. Write assignments where you can see them
Assignments are easy to forget when they are scattered across emails, classroom apps, syllabi, and notebooks.
A good student planner should give you one place to collect them.
When you receive an assignment, write it down as soon as possible.
You can include:
- Assignment title
- Due date
- Class name
- Important instructions
- First step to begin
The key is not to write too much. You only need enough information to remind yourself what needs to happen.
For example:
History essay — due Friday — choose topic by Tuesday
This is more useful than simply writing “essay,” because it gives you a clear next action.
3. Break big projects into smaller steps
Large assignments are stressful because they are often too vague.
“Write research paper” is not a task. It is a project.
To make it manageable, break it into smaller steps.
For example:
- Choose topic
- Find sources
- Read and highlight sources
- Create outline
- Write first draft
- Edit draft
- Submit final version
Once you break a project into steps, you can place those steps across multiple days.
This helps you avoid the common student problem of realizing too late that a big assignment needs more time than expected.
4. Plan study time around real events
Many students make study plans that look good but do not match real life.
For example, you might write:
Study for three hours every evening
But if you have classes, work, commuting, meals, and other plans, that may not be realistic.
Instead, look at your actual schedule first. Then place study time in the open spaces.
This is where an iPad planner can be especially helpful. You can see your fixed events and then write study plans around them.
For example:
- Review biology notes after class
- Study math for 45 minutes before dinner
- Work on essay outline on Saturday morning
- Review flashcards between classes
Small, realistic study blocks are usually easier to keep than huge, unrealistic plans.
5. Use weekly planning for exams
Exams need a different kind of planning.
If you only write the exam date, you may remember when the exam happens, but you may not prepare early enough.
Instead, use your weekly planner to work backward from the exam date.
For example, if your exam is on Friday, your week might look like this:
- Monday: Review lecture notes
- Tuesday: Practice problems
- Wednesday: Review weak areas
- Thursday: Light review
- Friday: Exam
This kind of planning reduces last-minute panic.
It also helps you see whether you are trying to prepare for too many exams or assignments at the same time.
6. Keep a simple daily task list
A daily task list is useful, but it should not become too long.
If you write too many tasks, the list becomes discouraging. Instead, choose the most important tasks for the day.
A simple format is:
- Must do
- Should do
- Could do
For example:
Must do
- Submit English assignment
- Review chemistry notes
Should do
- Start history reading
- Organize lecture slides
Could do
- Clean up digital files
- Prepare next week’s planner
This keeps your day focused without making your planner feel like a punishment.
7. Use handwriting for quick thoughts
One of the biggest advantages of using an iPad planner with Apple Pencil is that you can write naturally.
Not everything needs to be typed.
Handwriting is useful for:
- Quick reminders
- Brainstorming
- Class notes
- Study plans
- Rough outlines
- Personal reflections
For many students, handwriting feels more flexible than typing. You can circle important things, draw arrows, highlight deadlines, or write small notes in the margins.
This makes the planner feel more personal and easier to use.
8. Review your planner at the end of the day
Planning is not only about writing tasks in advance.
It is also about checking what actually happened.
At the end of the day, take a few minutes to review your planner.
Ask yourself:
- What did I finish?
- What needs to move to another day?
- What is coming tomorrow?
- Is there anything I forgot to write down?
This small habit keeps your planner useful.
You do not need a long review. Even two or three minutes can make a difference.
9. Do not make your system too complicated
The best planner system is the one you actually keep using.
It can be tempting to create a very detailed system with color codes, categories, icons, and rules. That can be fun, but it can also become too much.
For students, a simple system is often better.
You might only need:
- Calendar events for fixed schedules
- Handwritten notes for flexible tasks
- A weekly review
- A short daily task list
If your planner helps you understand your week, it is working.
It does not need to look perfect.
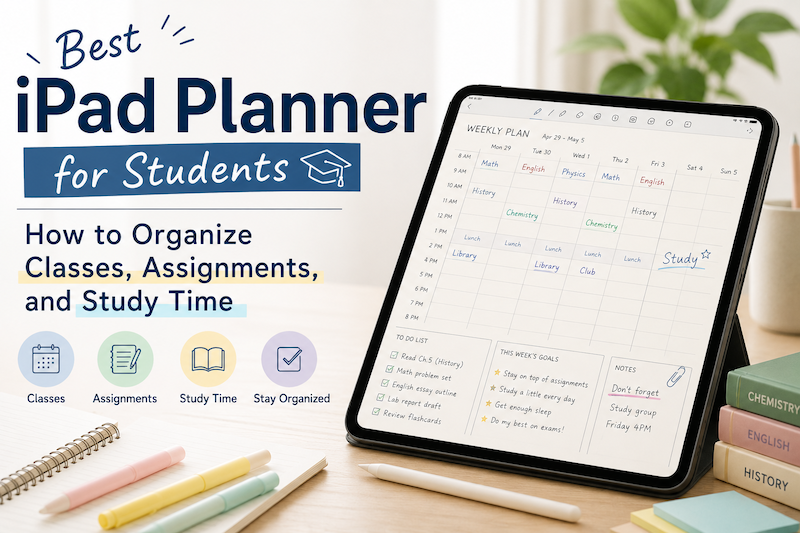
Why Planner for iPad is a good fit for students
Planner for iPad is designed for people who want both digital calendar structure and handwritten planning.
For students, this combination is especially useful.
You can see your schedule on planner pages while still using Apple Pencil to write assignments, study plans, notes, and reminders by hand.
Instead of switching between a calendar app, a notebook, and a to-do list, you can keep your planning in one place.
Planner for iPad works well if you want to:
- Organize classes and study time visually
- Write plans by hand with Apple Pencil
- See calendar events directly on planner pages
- Keep daily and weekly planning simple
- Use your iPad as a central study tool
Student life changes from week to week. Your planner should be flexible enough to change with it.
Final thoughts
A good student planner does not need to be complicated.
The goal is simple: help you see what is happening, what needs to be done, and when you have time to do it.
An iPad planner can make this easier by combining the best parts of a calendar app and a handwritten notebook.
Start with your class schedule.
Add assignments as soon as you receive them.
Break big projects into smaller steps.
Plan study time around your real week.
Review your planner regularly.
With a simple system, your iPad can become more than a device for taking notes. It can become the place where your student life feels organized and manageable.