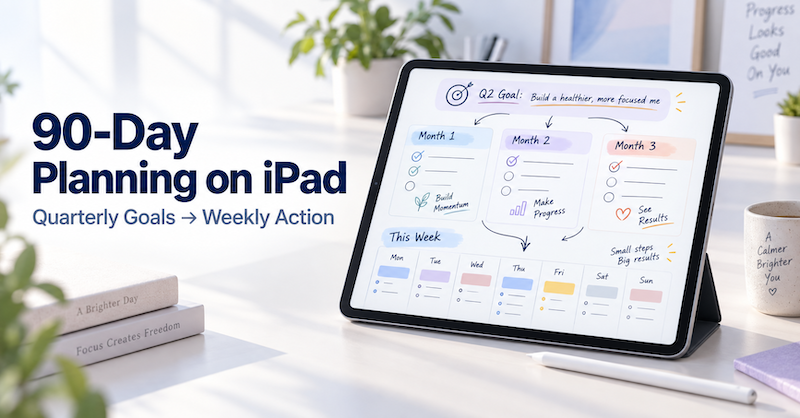
A year is long enough for a goal to remain comfortably vague.
A day is short enough for urgent work to consume everything.
Ninety days sits between those two extremes.
It gives you enough time to complete something meaningful, but it is close enough that you cannot keep postponing the first step. That makes a 90-day plan especially useful for projects, study goals, business improvements, health routines, creative work, and personal changes.
The challenge is not choosing a goal.
The challenge is connecting that goal to the week in front of you.
This guide explains how to create a simple 90-day planning system on iPad using Apple Pencil, your existing calendar, and Planner for iPad.
Why Plan in 90-Day Cycles?
Annual goals often fail because the deadline feels distant.
You write:
- Launch a new project
- Improve my fitness
- Learn a language
- Build a portfolio
- Organize my finances
These may be worthwhile goals, but they do not tell you what should happen this month—or what you should do next Tuesday.
A 90-day cycle creates a more useful distance.
It is long enough to:
- Complete several stages of a project
- Develop a consistent routine
- Make measurable progress
- Recover from a difficult week
- Adjust the plan when circumstances change
But it is short enough to remain visible.
You can see the beginning, middle, and end of the cycle without pretending that you know exactly what your life will look like twelve months from now.
A 90-Day Plan Is Not a 90-Day Task List
One common mistake is trying to plan every day of the next three months in advance.
That usually creates a detailed plan that becomes outdated within the first two weeks.
Meetings move.
Projects take longer than expected.
Family obligations appear.
Your energy changes.
A useful 90-day plan should provide direction without attempting to predict every detail.
Think of it as a hierarchy:
90 days: What result am I trying to create?
This month: What milestone should I reach?
This week: What progress is realistic?
Today: What is the next useful action?
Each level answers a different question. You do not need to copy the same task into four different places.
For a broader explanation of these planning levels, read Daily, Weekly, Monthly, or Yearly? How to Choose the Right iPad Planner View.
Step 1: Start With the Life You Already Have
Before choosing your 90-day goals, look at your existing schedule.
Open your calendar and review the next three months.
Mark anything that will significantly affect your time or energy:
- Travel
- Vacations
- Major work deadlines
- Exams
- School breaks
- Conferences
- Medical appointments
- Family events
- Product launches
- Busy seasons
- Periods when you will deliberately work less
This step matters because a quarter that looks like 13 open weeks may contain far less usable time.
Perhaps one month includes a long trip.
Perhaps the final three weeks will be unusually busy at work.
Perhaps you have several family commitments during weekends.
A good plan starts with reality. It does not assume that every week contains the same amount of time.
With Planner for iPad, you can see events from calendars connected to your iPad and add handwritten observations around them. Your calendar shows what is already committed. Apple Pencil gives you space to think about what those commitments mean.
Step 2: Choose One to Three Outcomes
A 90-day plan works best when it is selective.
If you choose ten goals, you have probably created a wish list rather than a plan.
Try choosing no more than three outcomes. Depending on the rest of your life, one meaningful outcome may be enough.
An outcome describes what will be different at the end of the 90 days.
For example:
Too vague: Work on my website
Clearer: Publish the redesigned website by December 15
Too vague: Study more
Clearer: Complete the course and pass the certification exam
Too vague: Get organized
Clearer: Create a working system for managing household finances
The goal does not need to be perfectly measurable, but you should be able to recognize whether it happened.
A useful question is:
If these 90 days go well, what will exist at the end that does not exist now?
Write the answer somewhere visible.
Step 3: Give Each Month a Different Job
A quarter becomes easier to understand when each month has a purpose.
Suppose your 90-day outcome is:
Publish an online course by the end of the quarter.
You might divide the quarter like this:
- Month 1: Plan and record
- Month 2: Edit and build the sales page
- Month 3: Test and launch
This is more useful than simply writing “work on course” across three months.
Each month moves the project into a different state.
The same approach works for other goals.
Professional certification
- Month 1: Complete the first half of the material
- Month 2: Finish the course and begin practice tests
- Month 3: Review weak areas and take the exam
Home organization
- Month 1: Sort and remove unnecessary items
- Month 2: Create storage systems
- Month 3: Finish problem areas and establish routines
Fitness
- Month 1: Build consistency
- Month 2: Increase duration or difficulty
- Month 3: Complete a specific event or benchmark
The months do not need to be perfectly balanced. One stage may require five weeks while another needs only two.
The purpose is to make the sequence visible.
Use the Year View to circle the three-month period, mark the final outcome, and sketch the broad phases. The yearly planning guide explains how to use Apple Pencil for milestones, project periods, busy seasons, and uncertain plans.
Step 4: Turn Each Month Into Milestones
The 90-day outcome gives you direction.
The monthly plan tells you what progress should look like now.
At the beginning of each month, ask:
- What must be true by the end of this month?
- Which deadline will shape the rest of the month?
- Which week has the most space for focused work?
- Where are existing commitments concentrated?
- What should I finish early?
- What can wait until next month?
Choose one or two important milestones.
If you are creating an online course, the first month might contain:
- Confirm the course structure
- Record all core lessons
Then look at the events already visible in your calendar.
If the second week contains several meetings and the fourth week includes travel, the third week may be your best recording period. You can circle it, add a handwritten note, and avoid filling it with less important work.
The monthly page is not a place for every task.
It is a map showing where the most important work belongs.
For a more detailed monthly workflow, see Best Monthly Planner App for iPad with Apple Pencil.
Step 5: Plan the Week Around Capacity
A quarterly goal only becomes real when it changes what you do this week.
At the beginning of the week, review:
- Your 90-day outcome
- This month’s milestone
- Your fixed calendar events
- Any tasks already stored in Apple Reminders
- The actual amount of time and energy available
Then choose two or three weekly outcomes.
For the online course example, they might be:
- Finalize the outline
- Write scripts for the first four lessons
- Test the recording setup
These are more useful than a long list of disconnected tasks because they describe the progress the week should produce.
Next, compare them with your calendar.
If Monday and Wednesday are filled with meetings, do not assign your most demanding work to those days. Protect Tuesday morning for writing. Use Thursday afternoon to test the recording setup. Leave Friday partly open for unfinished work and unexpected changes.
This is where a weekly planner becomes valuable.
A monthly page can tell you that the course outline matters. The weekly page tells you whether you actually have time to finish it.
Planner for iPad lets you see calendar events and handwritten plans together, so you can build the week around commitments that already exist instead of copying your schedule into a separate PDF planner.
Read Best Weekly Planner App for iPad with Apple Pencil for a complete weekly planning method.
Step 6: Choose the Next Useful Action Each Day
Daily planning is where the 90-day goal becomes something you can do.
You do not need to think about the entire quarter every morning.
Look at the weekly outcome, check today’s schedule, and choose the next useful action.
Tuesday might look like this:
- 9:00–10:30: Write scripts for lessons one and two
- 11:00: Client call
- Send recording checklist after lunch
- 3:00–4:00: Write lesson three
- Note questions to resolve before recording
The daily plan should be small enough to survive contact with the real day.
A list of 20 tasks may look ambitious, but it ignores meetings, appointments, interruptions, transitions, and energy. A useful daily plan begins with fixed events and adds a limited amount of work around them.
Your calendar tells you where you need to be.
Your weekly plan tells you what matters.
Your daily page tells you what to do next.
For more detail, read Best Daily Planner App for iPad with Apple Pencil.
Keep Tasks, Events, and Planning Thoughts Separate
A 90-day system becomes confusing when every kind of information is treated the same way.
A simple division is:
Calendar
Use your calendar for commitments tied to a real date or time:
- Meetings
- Appointments
- Travel
- Classes
- Deadlines
- Reservations
Apple Reminders
Use Reminders to capture tasks you do not want to forget:
- Buy microphone cable
- Email course tester
- Review lesson titles
- Update payment details
Planner
Use your planner to decide:
- What matters this quarter
- Which milestone matters this month
- What is realistic this week
- What deserves attention today
- What needs to change
This prevents your planner from becoming another database that must be constantly maintained.
You do not need to rewrite every calendar event or Reminder by hand. Bring an item into the handwritten plan only when it helps you make a decision.
If you use Apple Reminders, the guide Best iPad Planner with Apple Reminders Sync explains how to turn captured tasks into a realistic daily plan.
Review the Plan Without Starting Over
A 90-day plan should change.
The purpose of reviewing it is not to judge whether you followed the original plan perfectly. It is to keep the plan connected to reality.
At the end of each week, ask:
- What moved forward?
- What took longer than expected?
- What no longer matters?
- What should happen next week?
- Is the monthly milestone still realistic?
- Do I need to reduce the scope?
- Am I leaving enough room for ordinary life?
If a week goes badly, do not automatically move every unfinished task into the next week.
That creates a growing backlog and makes the next plan unrealistic before it begins.
Instead, reconsider each unfinished item.
Some tasks still matter.
Some can be delayed.
Some can be simplified.
Some can disappear.
A plan should help you make those decisions. It should not preserve every intention forever.
Leave Buffer Inside the 90 Days
Do not schedule essential work through the final day of the quarter.
If your goal must be completed by the end of the 90 days, aim to finish the main work earlier.
For example:
- Weeks 1–10: Core work
- Week 11: Testing or review
- Week 12: Corrections
- Week 13: Buffer and completion
The exact structure will depend on the project, but the principle is useful.
Work expands.
Technology fails.
People respond late.
You get tired.
A plan without buffer assumes that nothing unexpected will happen. That is rarely a realistic assumption.
Empty space is not wasted time. It is what makes the rest of the plan believable.
Using Planner for iPad for 90-Day Planning
Planner for iPad combines the flexibility of handwriting with the structure of a real calendar.
You can use Apple Pencil to:
- Circle the three-month planning period
- Write your quarterly outcome
- Sketch phases across several months
- Mark milestones
- Identify overloaded weeks
- Add questions and uncertain ideas
- Cross out plans that changed
- Write weekly priorities
- Add notes around scheduled events
Calendar events connected to your iPad can appear on your planner pages, giving you a realistic starting point before you add more commitments.
This creates a simple movement between planning scales:
Quarter → Month → Week → Day
The larger view protects your direction.
The smaller view creates action.
You can think broadly without losing track of today, and plan today without forgetting what the quarter is supposed to accomplish.
Start Your Next 90 Days
You do not need to wait for January.
You can begin a 90-day cycle at the start of a quarter, the beginning of a school term, after a vacation, or in the middle of an ordinary month.
Choose one meaningful outcome.
Look at the commitments already on your calendar.
Give each month a purpose.
Then decide what progress is realistic this week.
A 90-day plan does not need to control every day in advance. It only needs to keep an important goal close enough that it continues to influence what you do next.
If you want to combine Apple Pencil handwriting with your real calendar schedule, download Planner for iPad on the App Store and start planning your next 90 days.